
Skarrsinger Karmelita Boss Fight Guide
Skarrsinger Karmelita, the song queen of the Skarr, is a powerful and graceful main boss found in the Far Fields. Once a legendary warrior whose voice united her people, Hornet encounters a weakened but still formidable version of the queen in a memory-based battle. The fight is a high-speed, multi-phase duel that tests your reflexes, adaptability, and ability to punish small openings in her relentless, dance-like assault.
Skarrsinger Karmelita
Location: Far Fields (Memory)
Rewards: Hunter's Heart

How to Unlock the Karmelita Fight
Section titled “How to Unlock the Karmelita Fight”To challenge Karmelita, you must enter her memories. This requires two key abilities and a journey through the Far Fields, starting from her statue in the Hunter’s March.
-
Obtain the Silk Soar Ability You need the high jump granted by Silk Soar to reach the hidden path leading to Karmelita’s location.
-
Obtain the Elegy of the Deep Ability The fight itself is a memory. You will need Elegy of the Deep to interact with her final resting place and initiate the battle.
-
Find the Hidden Path Starting from the Pilgrim’s Rest bench in Far Fields, head to the top right. Climb up and locate a statue of Karmelita. A secret path is located here, requiring Silk Soar to enter.
-
Reach the Final Chamber Follow the path to the Far Fields Bench (North). From this bench, head right until you find the chamber where you can use Elegy of the Deep to begin the fight.
Build & Preparation
Section titled “Build & Preparation”Karmelita is fast and constantly moving, so seeking-damage tools are extremely valuable. Below is a powerful late-game build, followed by excellent alternatives.
Alternative Crest Strategies
Section titled “Alternative Crest Strategies”- Reaper Crest: A great balanced option if you don’t have the Witch Crest. It rewards you with Silk for attacking after healing, allowing you to use Pale Nails more often.
- Architect Crest: For a tool-focused build. This Crest sacrifices your Silk Skill for a third tool slot, allowing you to bring another damage tool like Cogwork Wheel for an extremely aggressive, high-damage strategy.
How to Beat Skarrsinger Karmelita
Section titled “How to Beat Skarrsinger Karmelita”The fight begins with a short enemy gauntlet. Defeat the Skarr Scouts, Stalkers, and Last Claws to summon the queen herself.
-
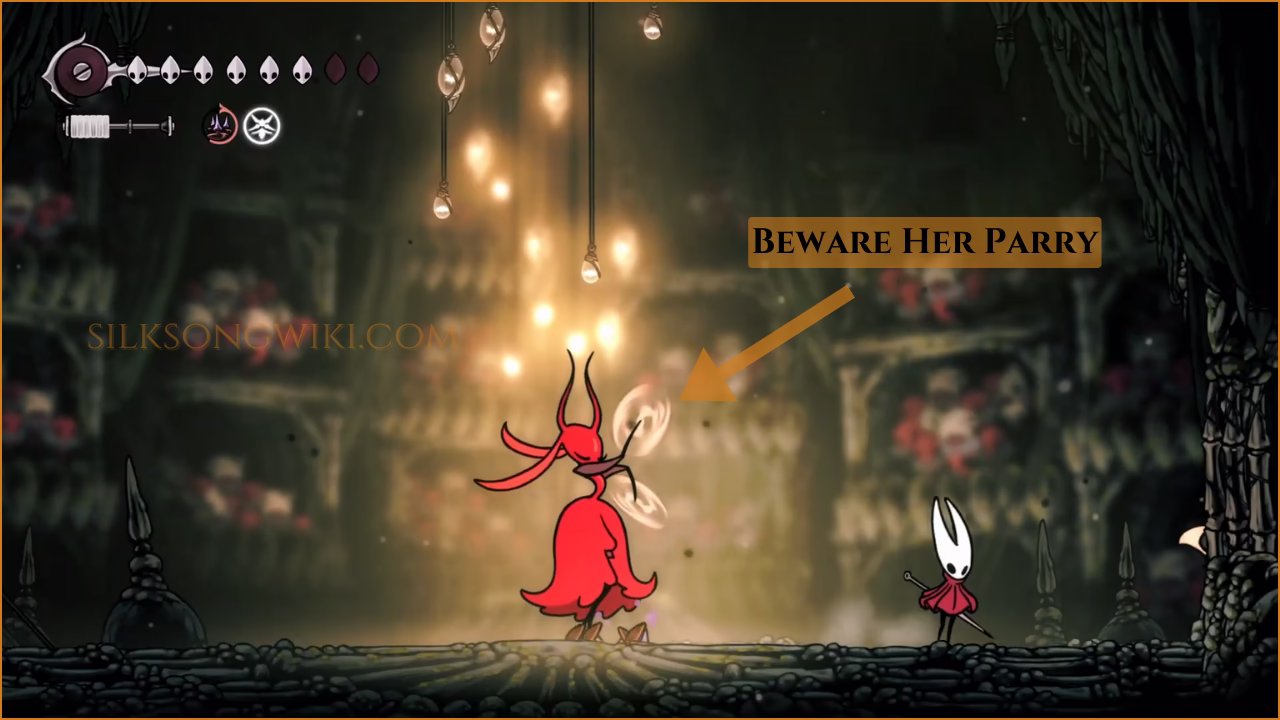
Beware Her Parry While gliding, Karmelita spins her curvesickles. If you hit her during this animation, she may parry your attack. Be cautious with close-range melee and use tools or jump attacks to bypass her guard.
-
Use Jump Attacks Many of Karmelita’s deadliest attacks cover the entire floor. The safest place to be is often in the air. Use frequent jump attacks (pogos) to simultaneously dodge ground attacks and deal damage.
-
Dodge Inward on the Twirl Dive When Karmelita leaps for her
Twirl Dive(slam) attack, your instinct might be to back away. Instead, dash inward toward her opposite side. This will keep you safe from the erupting bone spikes and place you perfectly for a counter-attack. -
Prepare for Phase 2 & 3 After taking enough damage, Karmelita will shout, marking a new phase. In Phase 2, some attacks are enhanced and she gains a new
Bone Chargeattack. In Phase 3, her attack speed increases significantly.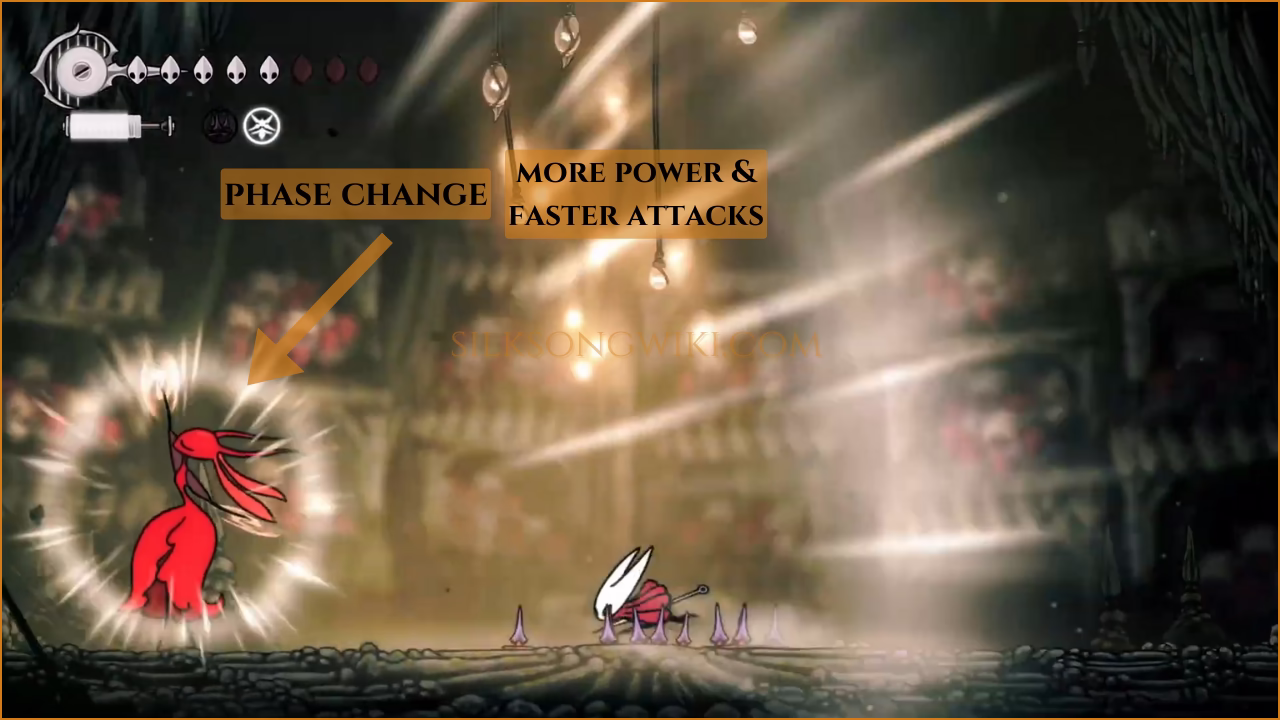
Attack Patterns & Counters
Section titled “Attack Patterns & Counters”Almost all of Karmelita’s direct attacks deal 2 Masks of damage. Simple contact damage is only one mask.
Karmelita performs up to three wide slashes while moving forward, covering about 60% of the arena. She may cancel the third slash or change it into a Twirl Slash.
Counter: This attack has huge range. Your best bet is to jump over her and pogo on her head, or create significant distance.
Karmelita does a bowing gesture and throws two blades: one horizontally, one diagonally upwards. In Phase 2, she may twirl and throw a second set immediately after.
Counter: Create space and jump through the gap between the two blades. Be prepared to dodge a second set in later phases.
She leaps into the air, pauses, and throws two blades downwards that then sweep horizontally across the arena. In Phase 2, she may throw a second set.
Counter: The initial jump is your telegraph. Move away from her landing zone to avoid the blades as they sweep outwards.
Karmelita strikes a pose (one arm up, one behind her back), then dashes forward while twirling rapidly with her blades.
Counter: The pose is a clear tell. Wait a brief moment, then perform a well-timed double jump to stay above the entire attack.
Karmelita leaps, rolls towards Hornet, and slams diagonally into the ground, causing a trail of bone spikes to erupt towards you.
Counter: Do not dodge backward. As she slams, dash inward, underneath her, to her opposite side. This avoids the spikes and sets you up for a punish.
Karmelita dashes to one end of the arena, latches onto the wall, then charges to the other side, causing massive bone spikes to erupt behind her.
Counter: This attack covers the whole floor. As she charges, you must double jump and glide to stay in the air until she passes and the spikes recede.
Rewards
Section titled “Rewards”Defeating the memory of the Skarrsinger in her prime allows Hornet to claim a valuable reward.
- Hunter’s Heart: You will obtain the Hunter’s Heart.