
Fourth Chorus Boss Guide (How to Beat)
Fourth Chorus is a colossal automaton and a mandatory main boss in Hollow Knight: Silksong, found dormant in the lava pits of Far Fields. This encounter is unique, playing out as a full-screen battle that tests your positioning and environmental awareness more than a direct duel. You’ll need to master dodging its massive, arena-altering attacks while chipping away at its single weak point to bring it down.

Fourth Chorus
Location: Lava Pit, Far Fields
Rewards: Servant Achievement

Where to Find Fourth Chorus
Section titled “Where to Find Fourth Chorus”Fourth Chorus is located in a large cavern in the lower part of the Far Fields region. You will see it inactive in the background on your first pass-through. The fight can only be initiated after you have acquired the Drifter’s Cloak from the Seamstress, who is located in a chamber just past the boss arena. Once you have the cloak and return, the boss will activate.
Loadouts & Preparation
Section titled “Loadouts & Preparation”At this stage of the game, Hornet’s arsenal is still limited, which works fine as this fight is more about platforming and patience than brute force.
- Primary Focus: Your main source of damage will be upward strikes with your Silkspear aimed at the boss’s head.
- Bench Location: The closest and safest bench is in the Seamstress’s chamber. Rest here before the fight to ensure a quick runback if you are defeated.
- Silk Management: If you find yourself low on Silk before the attempt, there is a hidden nook with silk webs just before the arena. Use the second, longer updraft in the preceding chamber to reach it and top off your supply.
How to Beat Fourth Chorus
Section titled “How to Beat Fourth Chorus”The key to this fight is understanding that you cannot damage any part of Fourth Chorus except for its head. The battle is a constant cycle of dodging its screen-wide attacks and using the brief windows of opportunity to jump and strike its face.
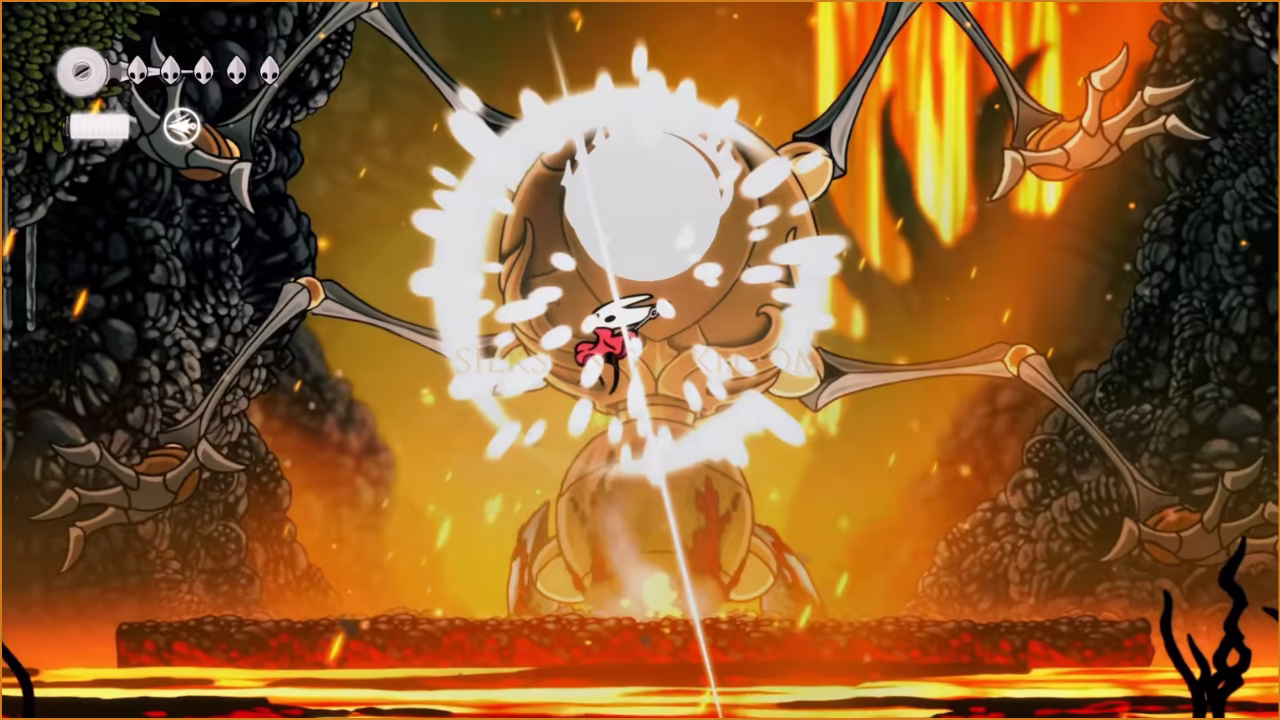
As you deal damage, the boss will become stunned briefly. This is your chance to unleash a flurry of attacks without needing to dodge. After the first stun, it will add a new attack to its arsenal, marking the beginning of Phase 2.
The final stage of the fight isn’t a new phase, but a unique finisher. After the second stun, air vents will activate on both sides of the arena. You must use your Drifter’s Cloak to ride these currents to the ceiling and destroy the two glowing molten rocks. The boss will continue attacking during this sequence, so stay vigilant. Destroying both rocks will trigger a cutscene where a large stalactite falls, defeating the boss for good.
Quick Runback from the Seamstress Bench
Section titled “Quick Runback from the Seamstress Bench”The path back to the Fourth Chorus arena from the Seamstress’s bench is short and relatively safe, making it the ideal respawn point.
- Exit the Chamber From the bench in the Seamstress chamber, head left into the large vertical cavern.
- Drop into the Arena Drop down into the main cavern. There are few enemies to worry about. Head right to enter the arena and trigger the boss fight.
Attack Patterns & Counters
Section titled “Attack Patterns & Counters”Fourth Chorus has a small, telegraphed moveset, but its attacks drastically alter the battlefield. The challenge comes from handling combinations of these moves as the fight progresses.
Phase 1 Attacks
Section titled “Phase 1 Attacks”Fourth Chorus will place one of its hands on the far left or right edge of the arena and sweep it across the entire platform. This attack is clearly telegraphed by a shine on the hand just before it moves.
How to Counter: Simply perform a well-timed jump over the hand as it passes. This is also an excellent opportunity to land one or two upward strikes on its head as you descend.
The boss raises a hand high above its head, which will glow briefly before it slams down vertically onto the platform. The impact temporarily destroys that section of the floor, revealing the lava below.
How to Counter: Quickly move to the left or right of the impact zone. As the fight progresses, you may need to use your Drifter’s Cloak to glide over the newly formed gaps. Be wary, as the boss can chain this move or combine it with a Hand Swipe immediately after.
Phase 2 Attacks
Section titled “Phase 2 Attacks”This phase begins after the first time the boss is stunned. It will use all its previous attacks, often faster and in combination, along with a new ranged attack.
Fourth Chorus will raise both hands and strike the ceiling, causing a shower of flaming boulders to rain down across the stage. Their landing spots are not telegraphed, so you must react quickly.
How to Counter: Stay mobile, weaving between the falling rocks. The boss is completely open to attack during this move, so this is a prime window to deal damage to its head while you dodge.
Fourth Chorus Rewards
Section titled “Fourth Chorus Rewards”For defeating Fourth Chorus, you will unlock the “Servant” achievement. This is a mandatory story boss, and defeating it is required to progress back through Far Fields and towards the Citadel, but it does not drop any currency, items, or new abilities.