
Second Sentinel Boss Fight Guide
The Second Sentinel is a unique character in Hollow Knight: Silksong, beginning as a dormant automaton NPC in the Cogwork Core and evolving into a formidable boss in the High Halls. The journey to this fight involves restoring the Sentinel and aiding it in battle, culminating in an honorable duel known as the Final Audience. This is a battle of fundamentals against a highly mobile opponent with a complex, combo-heavy moveset.

Second Sentinel
Location: High Halls (East)
Rewards: Reserve Bind Tool, Final Audience Wish Fulfilled

How to Unlock the Second Sentinel Fight
Section titled “How to Unlock the Second Sentinel Fight”The duel with the Second Sentinel is the final step of a multi-part side quest. You must first find and restore the Sentinel.
-
Find the Dormant Sentinel Locate the inactive automaton in the Cogwork Core, hidden behind a breakable wall.
-
Collect 3 Cogheart Pieces Explore the Citadel and surrounding areas to find three Cogheart Pieces.
-
Assemble the Cogwork Heart Return to the Sentinel with the pieces. Interacting with it will assemble the Cogwork Heart and activate it.
-
Assist the Sentinel in Battle (x2) The Sentinel will now appear in the Choral Chambers. You must find it and help it defeat two separate hordes of enemies. One encounter is next to Songclave, the other is in the long corridor above the area’s title on the map.
-
Retrieve the Conductor’s Melody After helping it, you must obtain the Conductor’s Melody item.
-
Accept the Final Audience Wish With all prerequisites met, the Final Audience wish will appear in Songclave. Accepting it will cause the Second Sentinel to move to its boss arena in the High Halls, ready for your duel.
Build & Preparation
Section titled “Build & Preparation”This fight rewards a balanced and reliable loadout. Since the Sentinel moves predictably from one end of the arena to the other, tools that seek targets or can be placed strategically are highly effective.
Excellent for this fight. The Cogfly’s seeking ability allows you to deal consistent, passive damage while you focus on dodging the Sentinel’s complex combos.
A strong defensive tool that can give you a safe window to heal, especially important for avoiding the high-damage flurry from a failed parry bait.
How to Beat Second Sentinel
Section titled “How to Beat Second Sentinel”This is a technical fight that punishes aggression. Focus on defense, learn the combos, and only attack in safe windows.
-
Identify the 2-Mask Attacks Three attacks deal a devastating 2 Masks of damage: Scissor Strike (X-Slash), Gilded Whirl (Spin Attack), and the counter from Gilded Parry. Prioritize dodging these above all else. Learning their telegraphs is critical.
-
Respect the Gilded Parry When the Sentinel holds a defensive stance and its blades flash, do not attack. Hitting the parry triggers a deadly flurry. Instead, use this moment to reposition or, if you have the space, to safely heal.
-
Master the Gilded Combo The Sentinel’s main ground combo can change. If you dodge the initial lunge by getting behind it, be ready for it to turn and chain into another attack. A single dodge is often not enough.
-
Control the Air The Sentinel frequently leaps, retreats to walls, and uses aerial versions of its attacks. Stay grounded unless you are intentionally jumping to dodge a specific move. Chasing it into the air is risky.
Attack Patterns & Counters
Section titled “Attack Patterns & Counters”The Sentinel’s attacks are fast and often chain together. Pay close attention to its starting animations.
The Sentinel reels one blade back and lumes forward, followed by a slash from the other blade. It can extend this with a second, shorter lunge if you are still in front of it.
Counter: Jump and dash over the initial lunge to land behind the Sentinel. Be prepared to immediately dodge again, as it may turn and continue the combo.
The Sentinel holds both blades behind its back and swings, sending a large wind projectile across the screen. An aerial version sends the projectile diagonally down.
Counter: The projectile is large but has a clear path. A well-timed jump will clear the ground version. For the aerial version, dash away from its trajectory.
Readies one blade forward and another back, then leaps forward while spinning upwards. It can chain into other aerial attacks from the peak of the spin.
Counter: This move has a vortex effect. Dash underneath the Sentinel as it begins its leap. Do not try to challenge it in the air.
Charges energy with a Needle Strike animation, then makes a small jump and unleashes a massive X-shaped slash.
Counter: The charge animation is a clear telegraph. As soon as you see it, create as much distance as possible. The attack has a large area of effect.
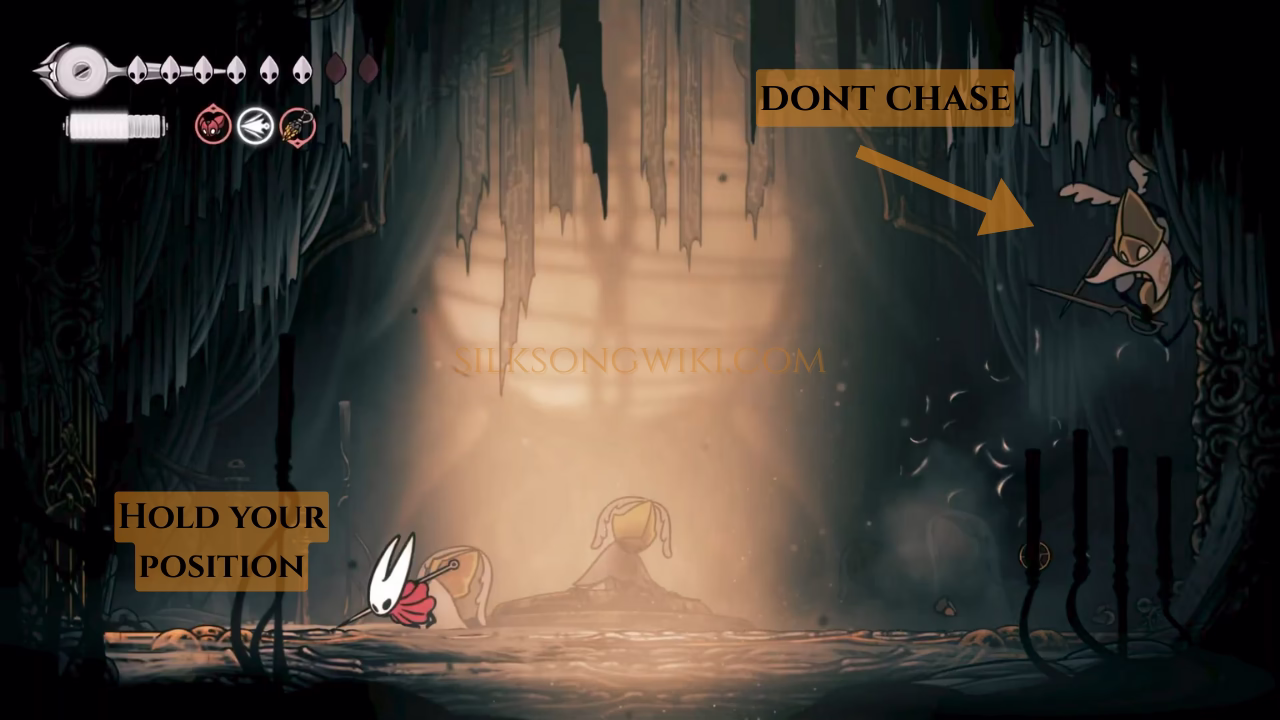
The Sentinel makes a large backward leap, clinging to the arena wall before launching an aerial Power Blade or Aerial Lunge.
Counter: This is a repositioning move. Do not chase it. Stay in the center of the arena and prepare to react to the follow-up attack from the wall.
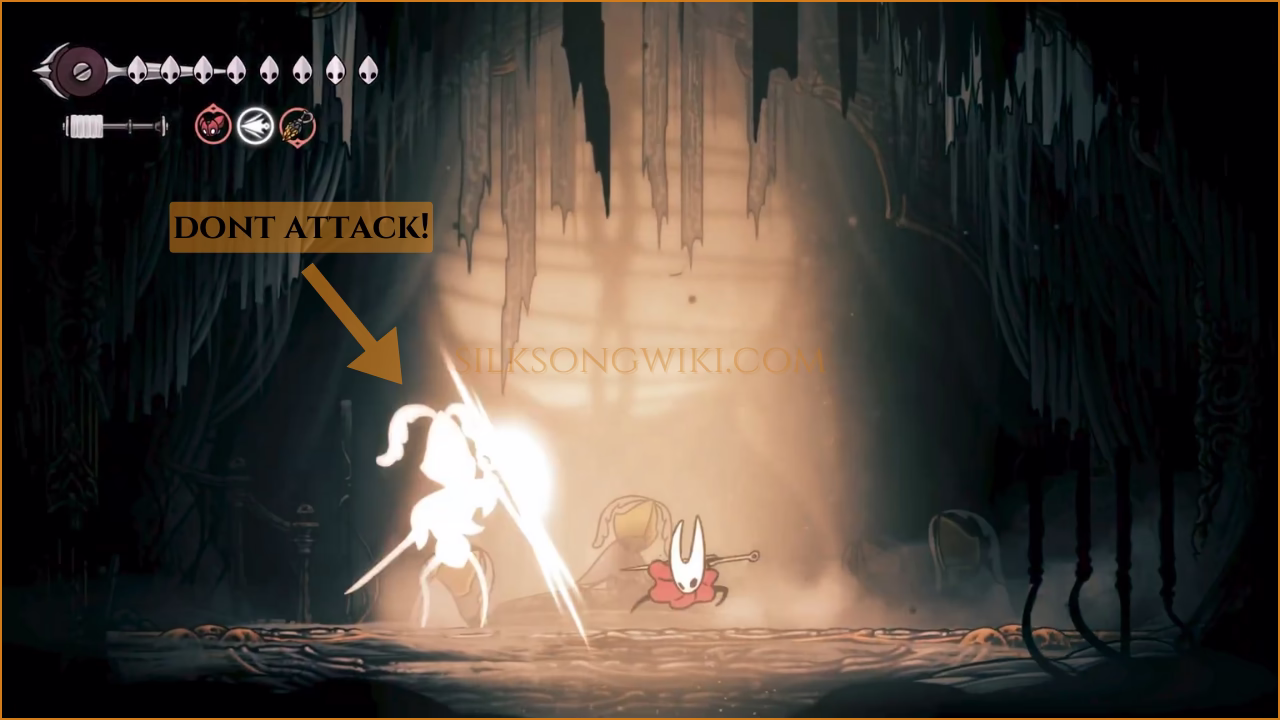
If Hornet is too close, the Sentinel will strike a defensive stance, blocking all damage. If hit, it counters with a deadly flurry of strikes.
Counter: DO NOT ATTACK when you see this stance. Use the opportunity to back away and heal or reposition. This is not an attack window.
Rewards
Section titled “Rewards”Upon defeat, the Second Sentinel gracefully acknowledges Hornet and grants her a reward for fulfilling the final wish.
- Reserve Bind Tool: You receive the Reserve Bind tool. This is a blue tool that stores one full bind’s worth of Silk. It allows you to heal for one mask even if your main Silk spool is empty. It has a single use and must be recharged by resting at a bench, making it an excellent emergency healing option.
- Final Audience Wish Fulfilled: Defeating the Sentinel completes the Final Audience side quest. In Act 3, the Second Sentinel can be found again and spoken to in the room to the left of the Grand Bellway station.